glimpses Support Page
glimpses | Keep memories alive
Keep memories alive
Welcome to glimpses!. With our minimalistic design, glimpses focuses on paving a simple journaling path for our users. In this guide we give an overview of how to get started with glimpses.
Table of contents
Getting started with glimpses
Pre-requisites
Below are the requirements to get started with glimpses.
- A Dropbox account
- Microsoft Windows 7, Windows 8, Windows 8.1 or Windows 10 Once you have these at hand, you are all set to go!!.
Download & Installation
glimpses can be downloaded when payment is made through our website, after which you will be receiving an e-mail with a link to download glimpses.
Once you have the glimpses-setup.exe file, you can double click to install it.
glimpses-setup.exe silently installs glimpses and will launch the app automatically.
Log in
When glimpses is launched, you should see a welcome screen like below.
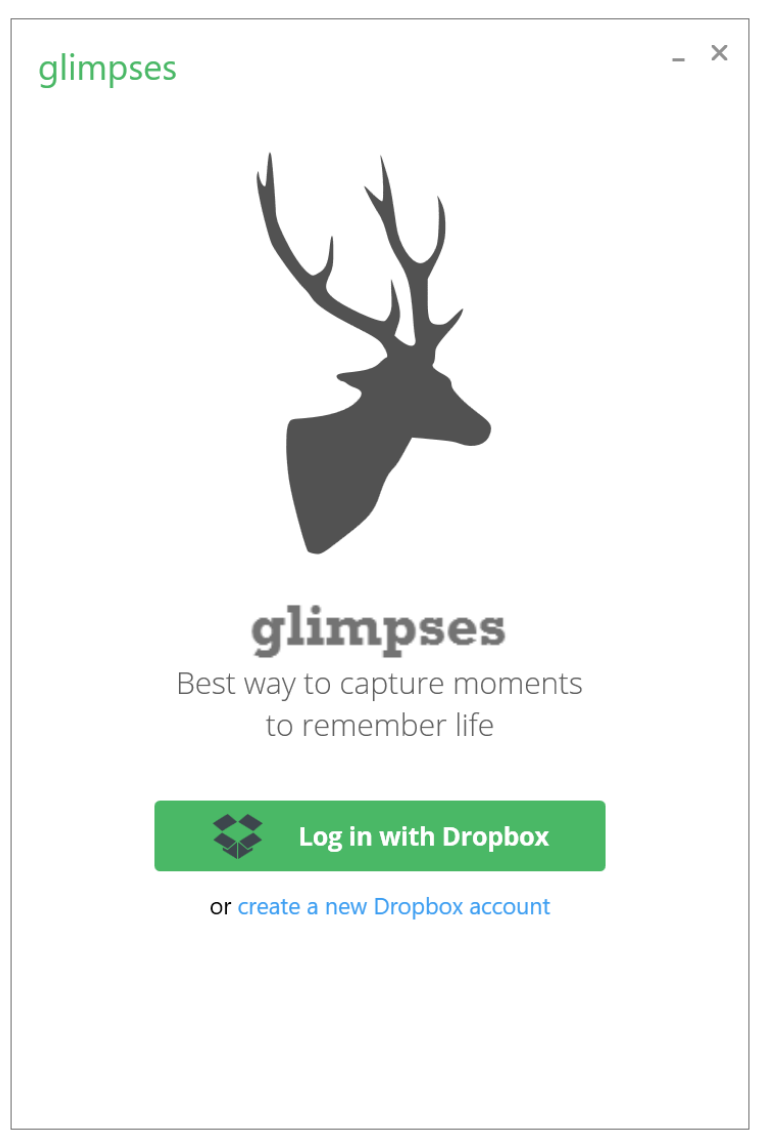
Click on “Log in with Dropbox” button. Then you will be prompted with the screen as shown below.
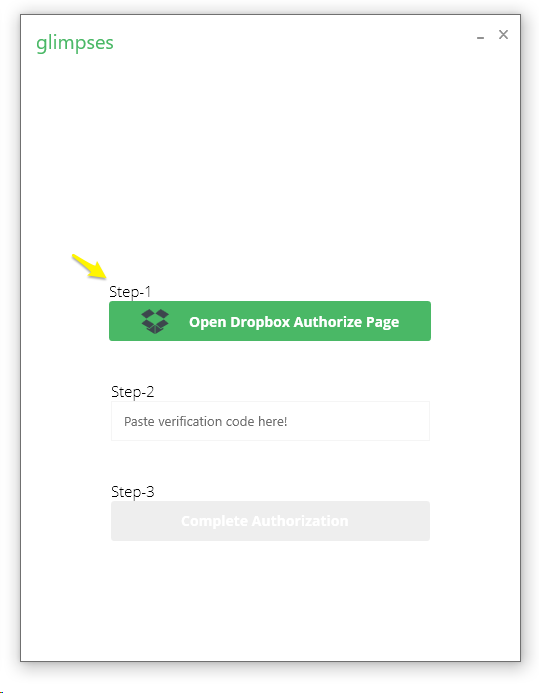
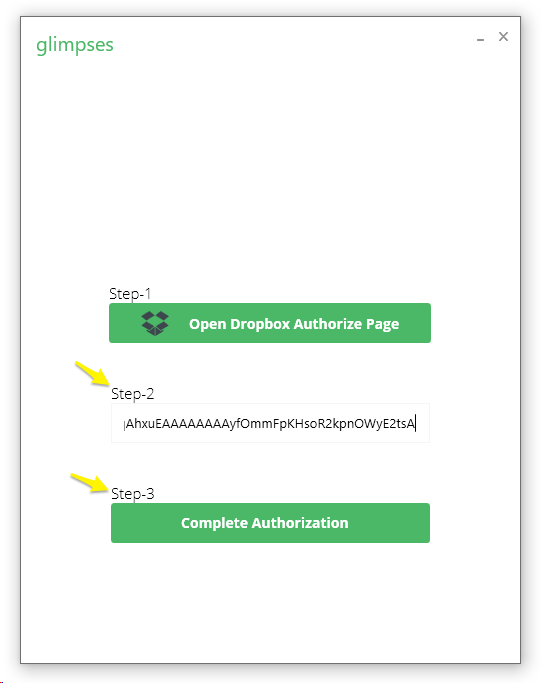
Please press the Open Dropbox Authorize page button. Now app redirects you to the Dropbox authorize webpage.
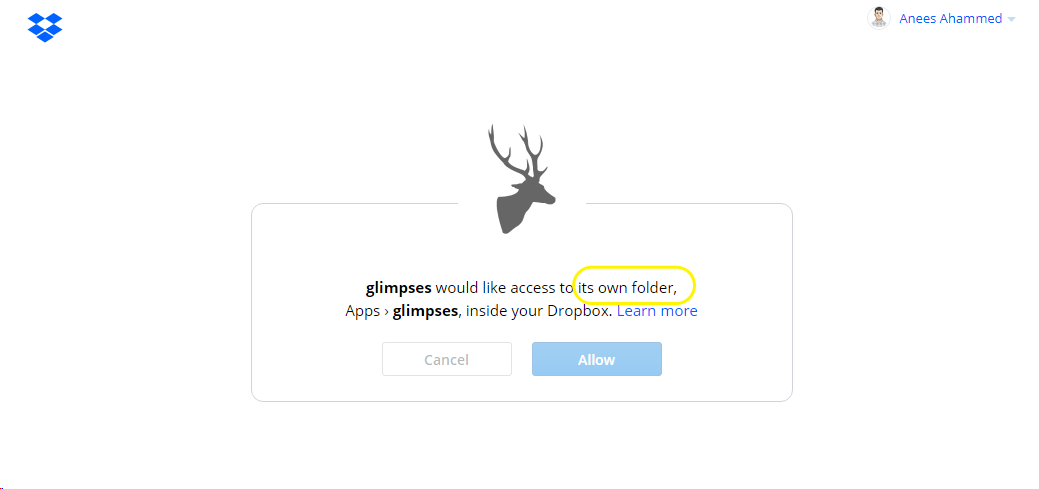
After a successful sign in, you will be presented with a screen to authorize glimpses to access to its own folder “Apps/glimpses” in your Dropbox account.
And once you authorize glimpses app, then a new page with authorization code (for a reusable token) will be shown.
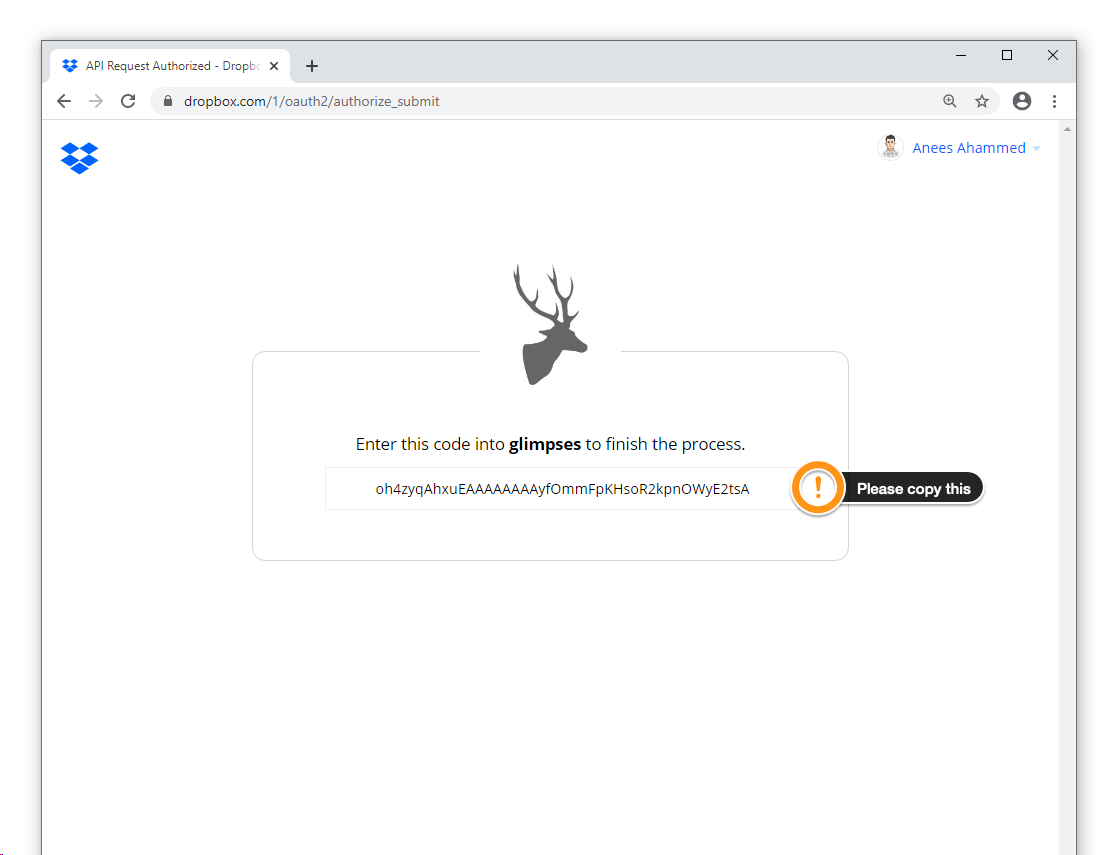
You need to copy this authorization/verification code and paste it on glimpses window (step2). Upon pasting “Complete Authorization” button will be enabled.
Please be noted that we do not store your password anywhere in the application or in glimpses servers.
We use Dropbox OAuth 2 open specification for authentication and authorization.
Please refer here for more details.
Create a new journal entry
To create a new journal entry, click the ”+” button on the menu bar or use key-board shortcut of Cntrl + N.

Then glimpses sets a distraction-free mode. It hides all sidebar controls and lets you focus on the writing.
You can toggle the distraction-free mode by clicking on it again, which gives you acess to the side-bar.
Add Image
Your entries can be made more memorable by adding an image to it. By clicking on the camera icon visible at the menu bar, you can choose your desired image from anywhere in your system.
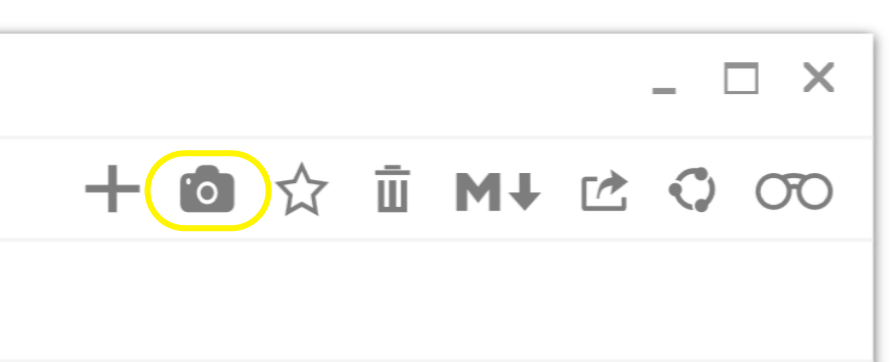
The image you have chosen can also be changed by either delete & add or just by adding on top of it.
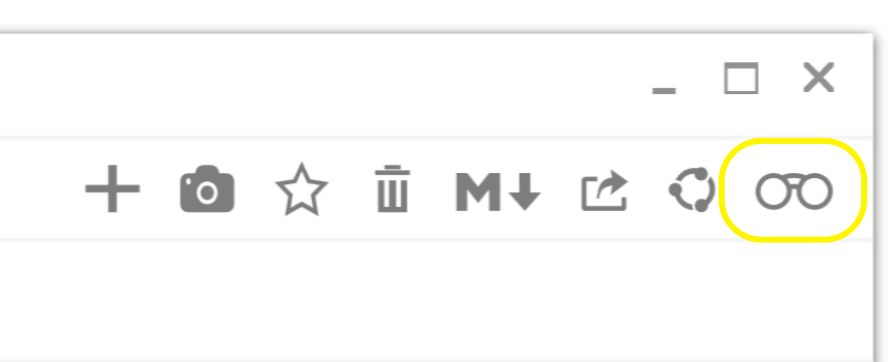
Favorites
Do you feel your journal entry for the day is special? Click on the star icon from the menu bar, and your entry will be added to the favorites list.
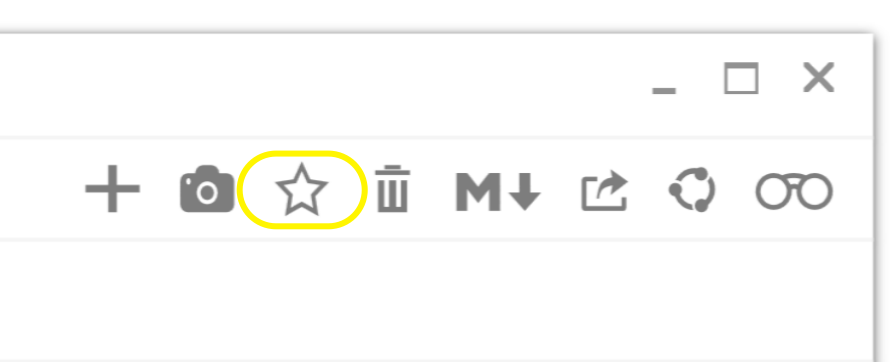
The star icon on the sidebar lists all your favorited entries.
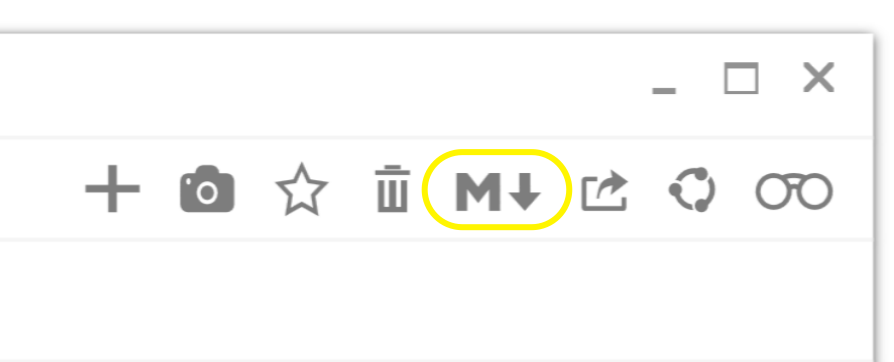
Markdown
glimpses comes with a support of ` common-mark ` compliant extensible markdown processor. The markdown button on menu bar is to preview you markdown entry, which on publishing will generate a private link, directing to an enriched HTML webpage.
PDF Export
To export your journal entry to a pdf format, click on this icon.
Your entries can be saved to your system this way.
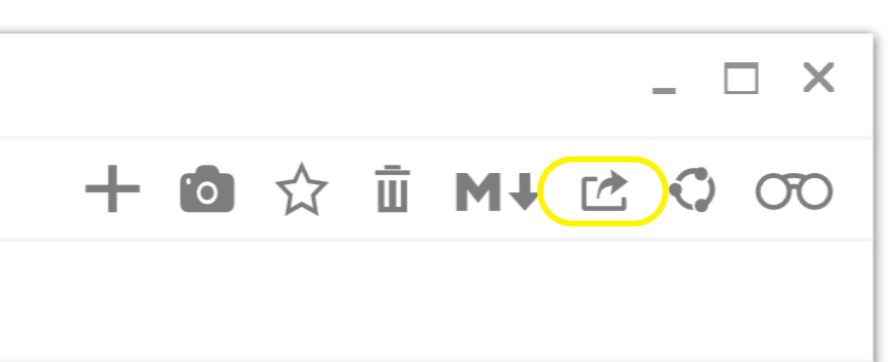
Publish
Your journal entries can be published by clicking on the icon shown below.
Once you click the button, a shareable link is created. Your default browser with this link is opened. Link generated is completely private and is not saved anywhere on glimpses server. Copying this url helps you share your journal entry.
This link is also uploaded to your Dropbox-links folder. If you no longer want the link to persist, you can simply delete the link file from Dropbox-links folder.
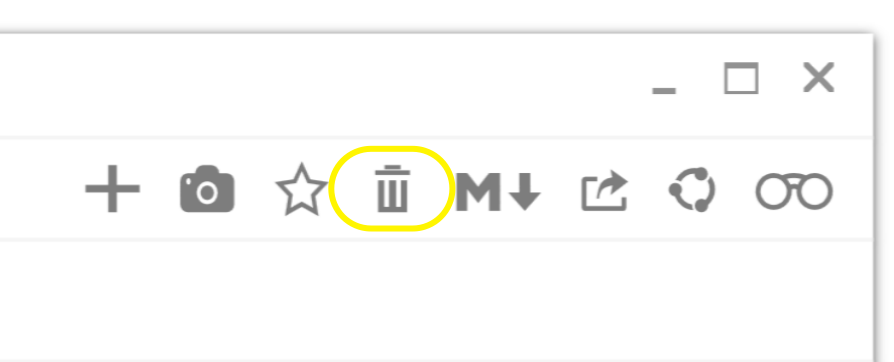
Delete entry
Your journal entry can be deleted by clicking on the trash icon at the menu bar. The recycle bin icon on the sidebar gives access to all your deleted entries, which can either be restored or permanently deleted from glimpses.
Add tags to entries
Tagging journal entries helps organize your entries based on any common theme. An entry can have multiple tags.
Tags are added at the top of the editor, right below the menu bar as shown below.

Tagged entries can be retrieved just by clicking on the tag icon at the side bar, where all your collective tags can be viewed.
Please help us to improve this docs.
If you think this documentation can be improved, feel free to discuss it in the issues. Please fork our GitHub repository here and open pull request with improvements.